Acceptance Criteria, Test Automation and Gherkin
What do Acceptance Criteria, Test Automation and a Cucumber have in common? Well for the uninitiated in may seem that these 3 things have nothing in common however if you are an “Agilist” or Test Automation specialist than you are probably very familiar with the similarities. Let’s start with the Cucumber specifically the Gherkin. The Gherkin as it happens is the most common type of cucumber used to make pickels. Gherkin is also the language used to Automated Acceptance Tests in a tool called Cucumber. Acceptance Criteria are the conditions for success for a new feature or part of a feature being added to solution. If the Acceptance Criteria is written in Gherkin format most of the heavy lifting of Test Automation has already been done. To automate acceptance tests in Visual Studio we use the Visual Studio version of Cucumber: SpecFlow. To get started using Gherkin Acceptance Criteria to Automate Acceptance Testing the Visual Studio IDE needs to be configured to use the Cucumber / SpecFlow extension.
Create a Virtual Machine in AWS install SpecFlow Extension in Visual Studio Community Edition and create an Automated Acceptance Test for a basic Stack object. Detailed Step By Step Instructions below video
Install SpecFlow Extension for Visual Studio
- In Visual Studio 2019 Community Edition
- In the Launch dialog choose Continue without code
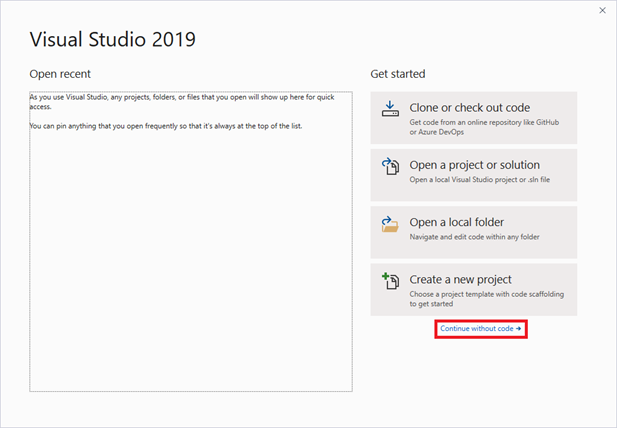
VS 2019 Continue without code - In the Extensions Menu Select Manage Extensions
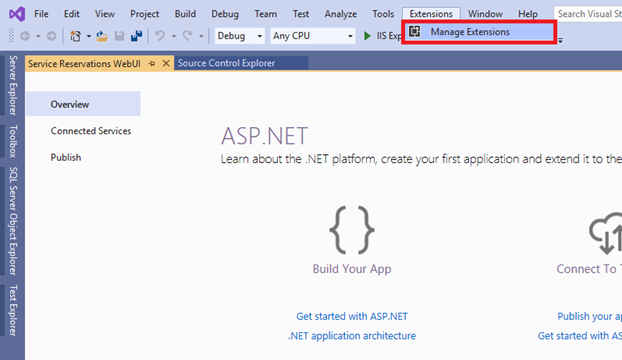
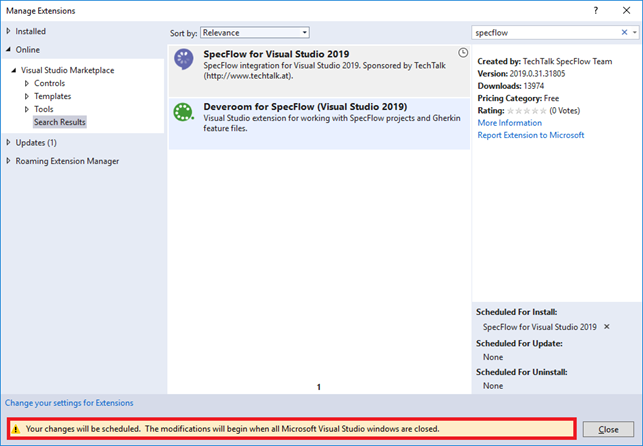
VS 2019 Manage Extensions - Select Online from the Navigation menu
- In the Search box type “SpecFlow”
- Select SpecFlow for Visual Studio 2019 and click Download
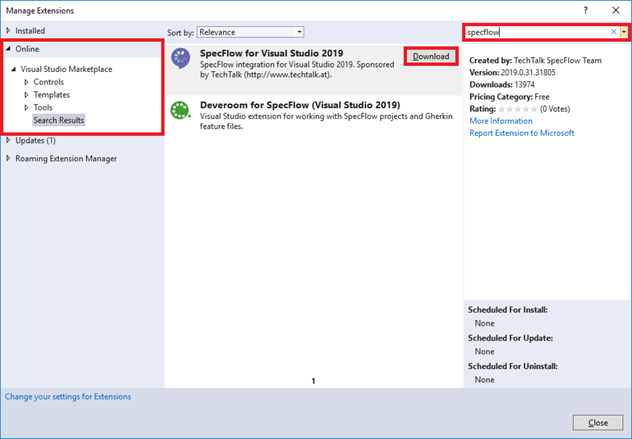
VS 2019 Install SpecFlow Extension - Click Close to close the Manage Extensions dialog
VS 2019 Close Visual Studio to complete SpecFlow Extension Installation - Exit Visual Studio
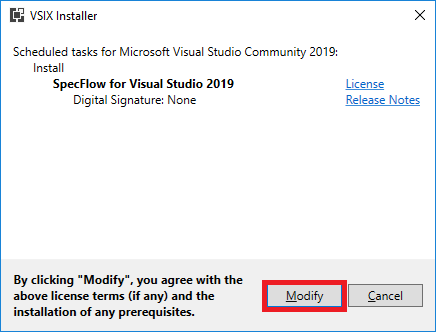
- Click Modify in the VSIX Installer dialog
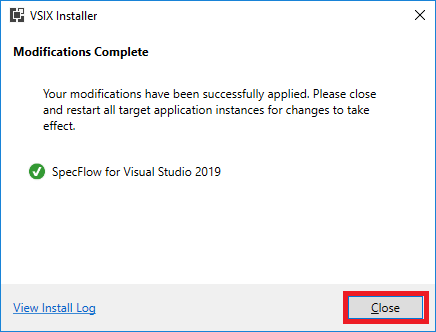
VSIX Installer – Modify - When Installation completes click Close in the VSIX Installer dialog
VSIX Installer – Installation Complete - Restart Visual Studio
Note: Visual Studio will not Install the Cucumber Extension until all Visual Studio windows are closed.
Create a Unit Test Project to Map Acceptance Criteria
- In order to Add Gherkin Feature Descriptions we will need to add a Unit Test Project.
- In Visual Studio from the File menu select New Project
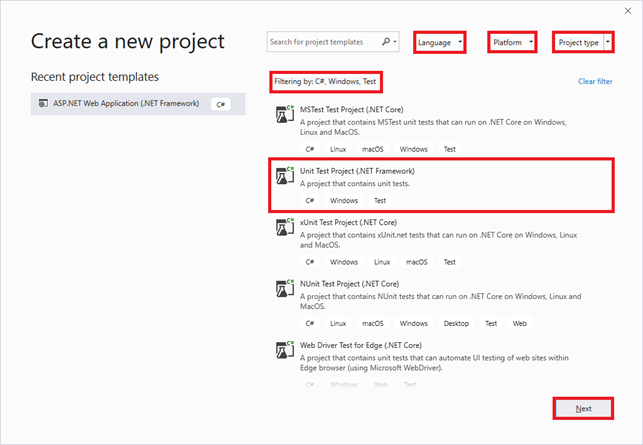
- In the New Project Dialog under Language select C# under Platform select Windows under Project Type select Test
-
Select Unit Test Project (.NET Framework) and click Next
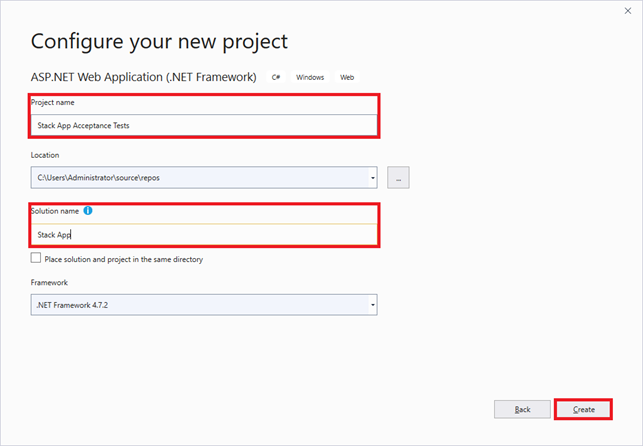
Create new Test Project - Name the Project Stack App Acceptance Tests
- Name the Solution Stack App
- Click Create
Configure new Project and Solution names - In the Solution Explorer
- Right Click UnitTest1.cs and select Delete
- Right click the Project and select Add New Item
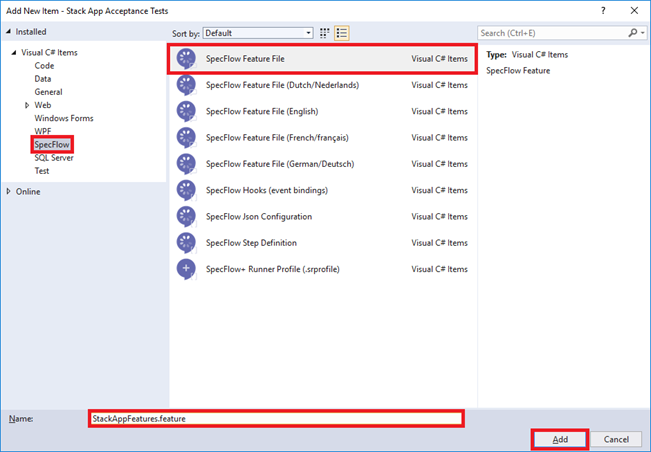
- Select the SpecFlow folder on the left
- Select SpecFlow Feature File
- Name the File StackAppFeatures.feature
- Click Add
Create new Stack Feature File - In the Solution Explorer select StackAppFeatures.feature
- In the Properties windows remove SpecFlowSingleFileGenerator from the Custom Tool Property
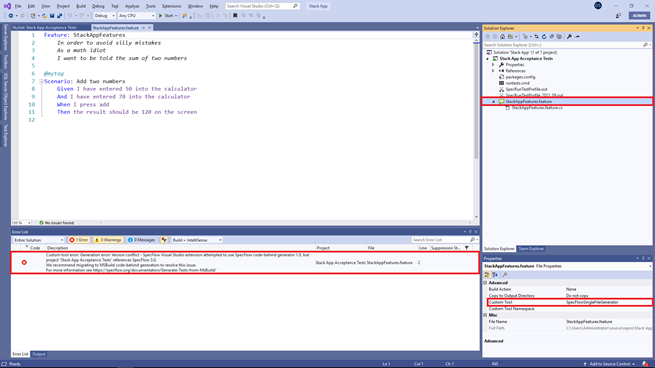
Remove SpecFlowSingleFileGenerator from the Custom Tool property
Note: The Custom tool error will disappear once the SpecFlowSingleFileGenerator text is removed from the Custom Tool Property of the StackAppFeatures.feature file.
Add SpecFlow NuGet Packages to Test Project
- Right click the Stack App Acceptance Tests Project
- Select Manage NuGet Packages… from the Menu
- In the NuGet Stack App Acceptance Tests window select Browse form the menu
- In the Search (Ctl+L) box type SpecFlow and press enter
- Select SpecFlow by TechTalk
- In the Detail window to the right click Install
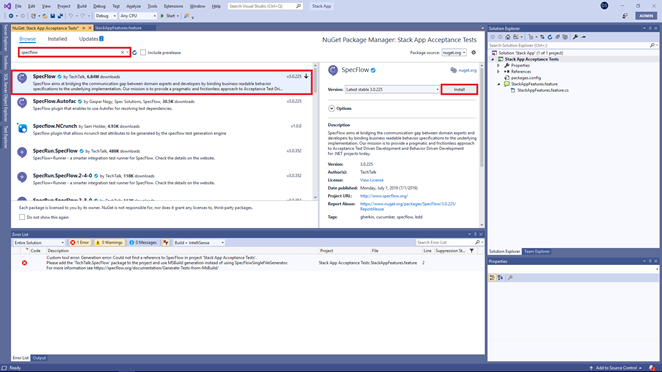
Install SpecFlow NuGet package in Test Project - In the License Acceptance dialog click I Accept

License Acceptance – I Agree to accept license terms - Select SpecRun.SpecFlow
- In the Detail window to the right click Install
- In the License Acceptance dialog click I Accept
- In the Search (Ctl+L) box type SpecFlow.Tools and press enter
- Select SpecFlow.Tools.MsBuild.Generation
- In the Detail window to the right click Install
Step Definitions
In the Solution explorer select StackAppFeatures.feature and replace the Math feature (User Story) and Acceptance Criteria with text below:
Feature: StackAppFeatures
As a User
I need to Stack stuff
So that I can move it around
@EmptyStack
Scenario: IsEmpty should be true
Given An Empty Stack
When I check IsEmpty
Then IsEmpty should be “true”
@NonEmptyStack
Scenario: IsEmpty should be false
Given A nonEmpty Stack
When I check IsEmpty
Then IsEmpty should be “false”
@PushTests
Scenario: Push Check IsEmpty
Given A Empty Stack
When I Push “Bugga Boo” onto the Stack
And I check IsEmpty
Then IsEmpty should be “false”
@PushPopTests
Scenario: Push Gets Popped
Given An Empty Stack
When I Push “Item 1” onto the Stack
And I Pop a value off the Stack
Then The result should be “Item 1”
@PushPeekTests
Scenario: Push Gets Peeked
Given An Empty Stack
When I Push “Item 1” onto the Stack
And I Peek at a value on the Stack
And I check IsEmpty
Then The result should be “Item 1”
And IsEmpty should be “false”
The purple text indicates that the Gherkin statement does not yet have associated step definitions. We’ll use the Code Generations tools in the SpecFlow extension generate the step definitions from the Gherkin Acceptance Criteria.
- Right click on Given an Empty Stack and select Generate Step Definitions
- In the Generate Step Definition Skeleton – SpecFlow dialog click Generate
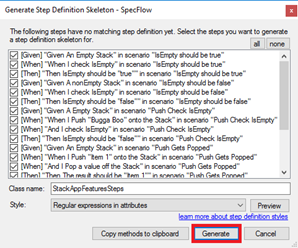
Generate Step Definitions - In the Select target step definition class file dialog accept the defaults and click Save
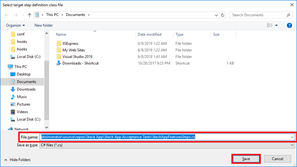
Accept Default location for Step Definitions class file
Feature Implementation – Test First
Now we will replace the ScenarioContext.Current.Pending(); placeholder code in each of the Given…When…Then… functions in the StackAppFeaturesSteps.cs class file with calls to our code under test
- In the Solution Explorer select the StackAppFeaturesSteps.cs class file
- Add the following code to the StackAppFeaturesSteps class
Stack stack;
String _actual;
Boolean _isEmpty; - In the public void GivenAnEmptyStack() function replace the ScenarioContext.Current.Pending(); with the code below
stack = new Stack(); - Replace the ScenarioContext.Current.Pending(); code in the GivenANonEmptyStack function with the code below
stack = new Stack();
stack.Push(“Hello, World!”); - Replace the ScenarioContext.Current.Pending(); code in the WhenICheckIsEmpty function with the code below
_isEmpty = stack.IsEmpty(); - Replace the ScenarioContext.Current.Pending(); code in the WhenIPushOntoTheStack function with the code below
stack.Push(p0); - Replace the ScenarioContext.Current.Pending(); code in the WhenIPopAValueOffTheStack function with the code below
_actual = stack.Pop(); - Replace the ScenarioContext.Current.Pending(); code in the WhenIPeekAtAValueOnTheStack function with the code below
_actual = stack.Peek(); - Replace the ScenarioContext.Current.Pending(); code in the ThenTheResultShouldBe function with the code below
Assert.AreEqual(p0, _actual); - Replace the ScenarioContext.Current.Pending(); code in the ThenIsEmptyShouldBe function with the code below
Assert.AreEqual(Boolean.Parse(p0), _isEmpty);
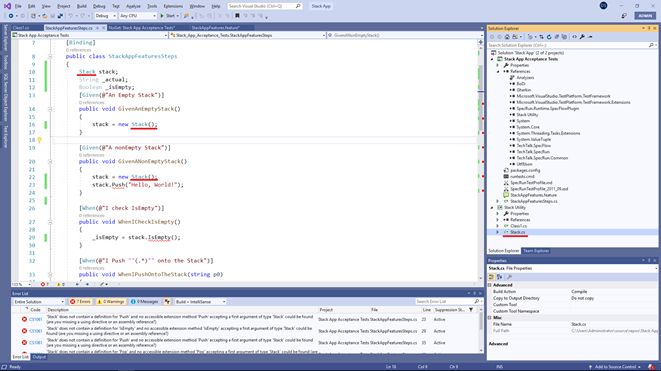
Now that we have our tests we can use code generation tools to create the class under test. At this point we will also have 5 syntax / reference errors, we will resolve these in the next steps.
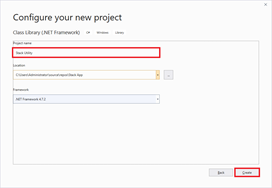
- In the solution explorer right click Solution ‘Stack App’ (1 of 1 project) select Add > New Project
In the Solution Explorer you should now see the Stack Utility project
Add new Class Library project - In the Solution Explorer select the StackAppFeaturesSteps.cs class file
- In the StackAppFeaturesSteps.cs class file hover the mouse over the Stack type with the red squiggles
In the Quick Actions menu (The lightbulb) select Generate type ‘Stack’ > Generate new type…
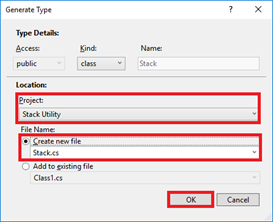
Use Quick Actions to Generate Stack Type - In the Generate Type dialog select Stack Utility from the Project dropdown, select the Create new file radio button and click OK
Note: the red squiggles under Stack are now gone
Stack exists – No more red Squiggles - In the StackAppFeaturesSteps.cs class file hover the mouse over the call to the stack.Push method and select Generate method ‘Stack.Push’ from the Quick Actions menu

Use Quick Actions to Generate Push method - Repeat the same process for the IsEmpty, Push, Pop and Peek methods
- In the StackAppFeaturesSteps.cs class file hover the mouse over the Assert in Assert.AreEqual and select using Microsoft.VisualStudio.TestTools.UnitTesting; from the Quick Actions menu
Note: You may now run the tests and see them fail - From the Test menu select Run > All Tests
Note: In the Test Explorer that of 6 Tests 3 failed. Only 5 were actual tests 1 was a SpecRun delay for the evaluation version. 3 Failed and the 2 Tests are ignored. The ignored tests call methods that were already tested and failed in this test run.
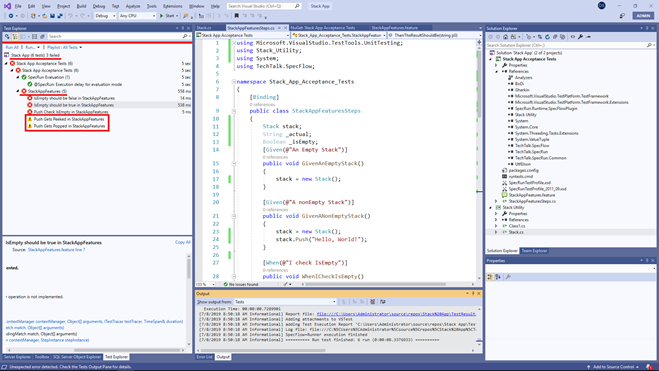
Run the Tests and see them Fail
Now that class skeleton has been created, we can implement the 4 methods, IsEmpty, Push, Pop and Peek.
- In the Solution Explorer select the Stack.cs class file in the Stack Utility project
- In the Stack class create a new stack variable of type ArrayList by adding the code below:
ArrayList stack = new ArrayList(); - Hover the mouse over the ArrayList type and select using System.Collections; from the Quick Actions menu
- In the Push method replace throw new NotImplementedException(); with the code below
stack.Insert(0,v); - In the IsEmpty method replace throw new NotImplementedException(); with the code below
return stack.Count == 0; - In the Pop method replace throw new NotImplementedException(); with the code below
String result = stack[0].ToString();
stack.RemoveAt(0);
return result; - In the Peek method replace throw new NotImplementedException(); with the code below
return stack[0].ToString();
Note: You may now run the tests and see them pass - From the Test menu select Run > All Tests
Note: All test should display a green check mark indicating a pass.
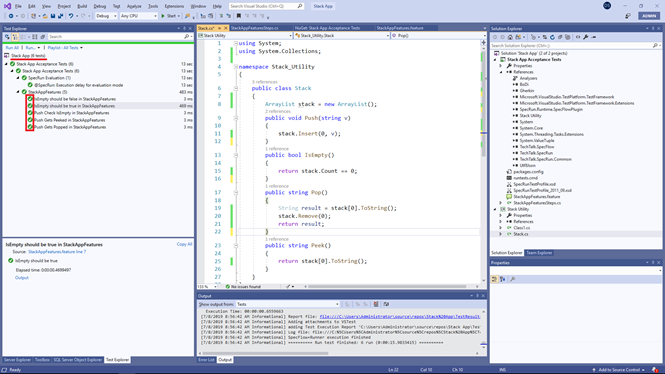
Green = Good Red = Bad – Run the Tests and see them Pass Now that we have the Step Definitions (Glue Code) defined adding new Automated Acceptance tests is a simple a pasting in new Gherkin statements. If the Product Owner adds new Acceptance Criteria to a user story we can simply copy and paste from the Work Item Tracking (Project Management) tool into our Feature file and we are done. No new coding. For example the Gherkin statement below can simply be added to the feature file with
@MultiPushPopTests
Scenario: Multi Push Pop
Given An Empty Stack
When I Push “Item 1” onto the Stack
And I Push “Item 2” onto the Stack
And I Pop a value off the Stack
Then The result should be “Item 2”
no additional changes necessary.